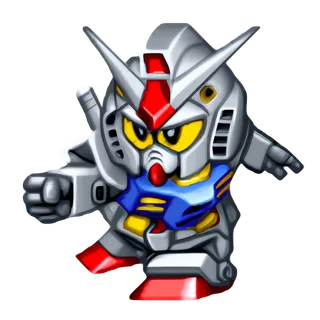
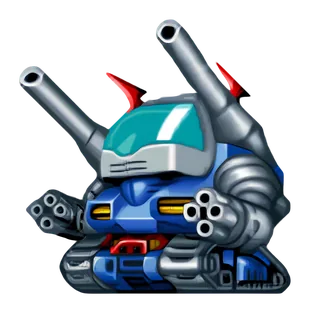
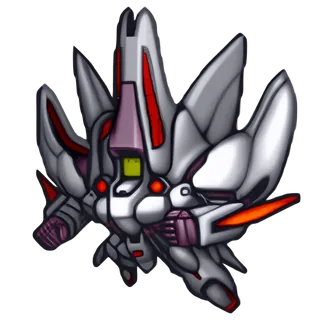
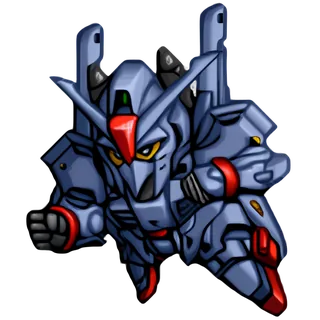
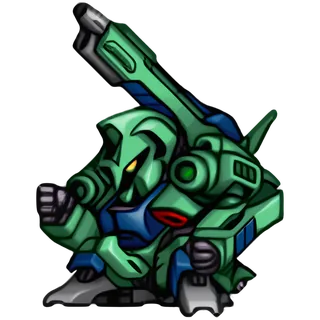
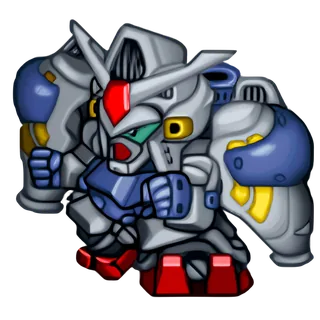
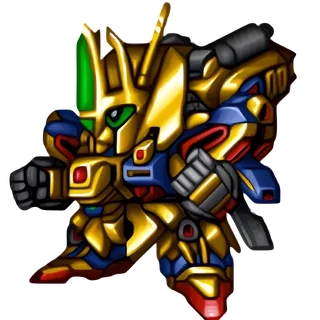
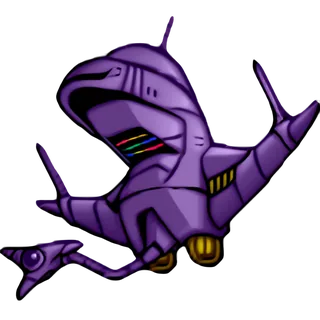
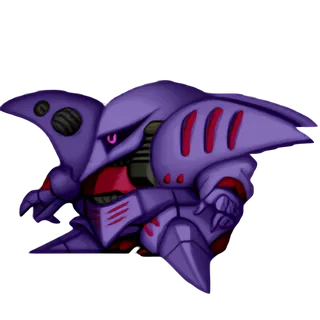
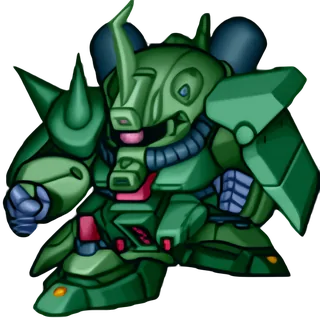
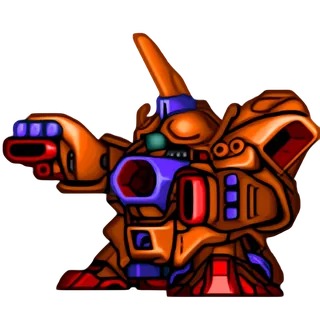
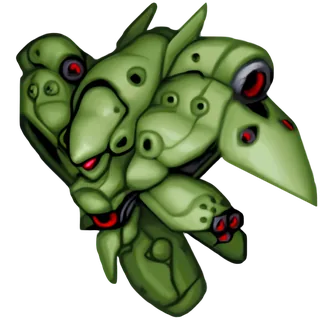
Character + unit | Brad exclusiveBrad; recruitable on the Independence Army / OZ routes, only the story changes on the Complete Pacifism route
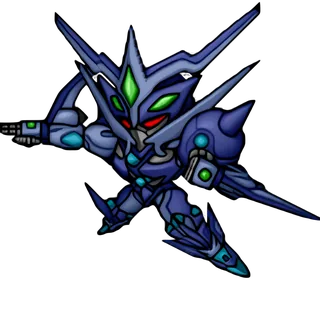
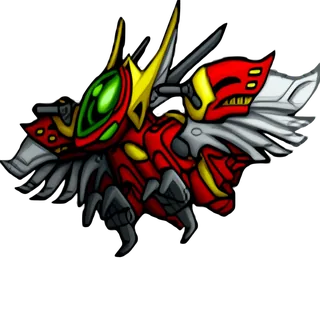
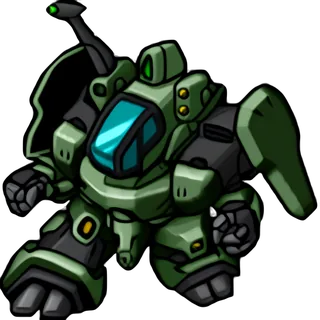
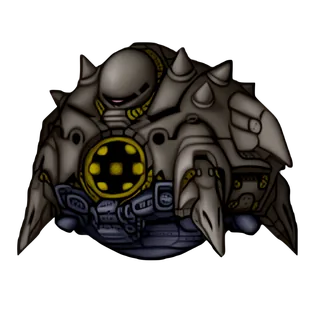
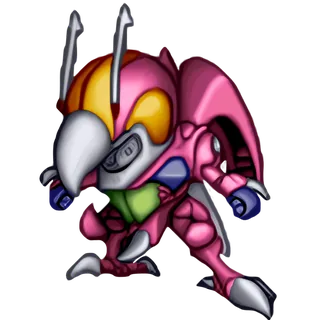
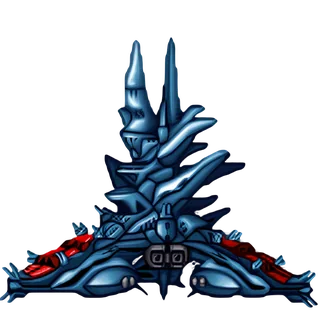
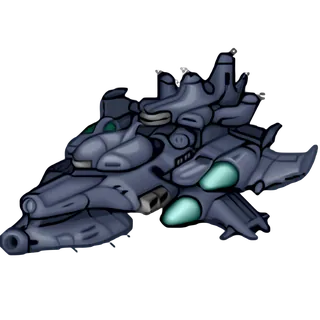
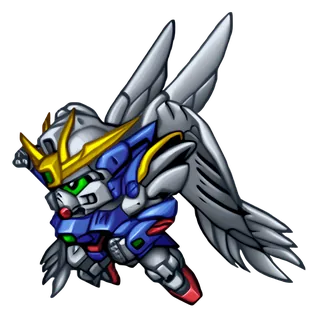
Kurtz + Virose (including Super Earthgain)
Brad shoots down Kurtz twice in total, one of them in the branching stage; then, at the moment Kurtz is shot down in “Time to Settle It”, Brad's kills must have reached 100Differs from Akurasu
Stage 8/15The Gundam That Leads to Ruin / Shapiro, Reborn!Common
In “The Gundam That Leads to Ruin”, Kurtz appears on the player phase of turn 3 or when 12 or fewer enemies remain; in “Shapiro, Reborn!” he appears on the enemy phase of turn 4, and if Brad isn't on the map then, he withdraws immediately. Shoot him down with Brad; a shoot-down on Brad's counterattack also countsNot on Akurasu
Stage 24False PeaceIndependence Army route
Kurtz appears as a third party when the enemy is wiped out or in the turn 4 player phase; Brad can shoot him down here
Stage 21A New PathOZ route
Kurtz appears in the turn 3 player phase or when the enemy is down to 15 or fewer; he retreats immediately if Brad isn't on the map
Stage 25Distant PeaceComplete Pacifism route
Kurtz appears when the enemy is down to 6 or fewer; he retreats immediately if Brad isn't on the map
Stage 32Earth Sphere in ChaosIndependence Army route (branch stage)
Kurtz appears on turn 4 or when the enemy is wiped out. In this stage Brad must shoot him down again, and that one also counts toward the two; once the conditions are met, clearing the stage goes straight to “Time to Settle It”, with no choiceDiffers from Akurasu
Stage 31Order to Eliminate TreizeOZ route (branch stage)
Kurtz appears in the second wave after the enemy is wiped out. Same as before: have Brad shoot him down; after two times in total you automatically go to “Time to Settle It”
Stage 32/33Time to Settle ItBrad branch
Only Brad deploys, one-on-one with Kurtz; the game is over if Brad is destroyed. Brad's kill count is checked the moment Kurtz is shot down; 100 or more means successDiffers from AkurasuNot on Akurasu
Kurtz + Virose (3 upgrade levels) join; once both reach level 35, the Earthgain and Virose can use the combination attack “Shorai Tenryu Mametsujin”Not on Akurasu
- Recruiting Kurtz means you never switch to the Super Earthgain; it is one or the other, and the Super Earthgain does not have “Shorai Tenryu Mametsujin”
- When the switch to the Super Earthgain happens: if “Time to Settle It” wasn't reached → on clearing the branching stage; if it was reached but kills were under 100 → at the start of the next stageNot on Akurasu
- It only matters whether the other side in the fight is Brad: someone else shooting down Kurtz doesn't count, but doesn't void earlier counts either
- After the branch you return to your route: the Independence Army route continues with “Mars and Marg”, the OZ route with “Storm of Kilimanjaro”, and every later stage number is 1 higher than without the branch
- The Complete Pacifism route has no “Time to Settle It”. If Brad shoots down Kurtz in “What We Fight For” and the total reaches two, Kurtz survives and hands over the Virose himself, but doesn't join; in both versions of the story you swap to the Super Earthgain when the stage is clearedNot on Akurasu
- Whether the shoot-down of Kurtz itself counts toward the 100 is unconfirmed; to be safe, reach 100 before entering “Time to Settle It”Not verified in game
- After recruiting Kurtz, 7 later stages have extra Kurtz lines (see “Dialogue-only branches”)
Differences from Akurasu
- Akurasu says “shoot him down twice before the branching stage”; the script only checks at the shoot-down in the branching stage, so Brad must shoot down Kurtz in the branching stage, and that one also counts toward the two
- Akurasu's summary table says the 100 kills must be reached before the branching stage ends; the script checks only at the moment Kurtz is shot down in “Time to Settle It”
- Akurasu's flowchart says pick the 3rd option at the end of the branching stage; Brad's scenario has no choice here — if the conditions are met you go straight to “Time to Settle It”
- Akurasu only says the Complete Pacifism route can't get Kurtz, and doesn't mention the story branch where Kurtz survives and hands over the Virose
Character + unit | Manami exclusiveManami; the steps differ across the three routes
Aisha + Elbulls
Persuade or pick the right lines according to your route; Manami must be on the map at the moment of the last step, or it fails for goodDiffers from Akurasu
Stage 24False PeaceIndependence Army route
Aisha appears as a third party when the enemy is wiped out or in the turn 4 player phase. Persuade her with Manami (step one, no prerequisite)
Stage 28OZ Divided (Part 1)Independence Army route
Aisha is there from the start. Persuade her again with Manami (requires step one, otherwise there's no persuade command)
Stage 31Its Name Is EpyonIndependence Army route
Checked once when 9 or fewer enemies remain: Manami on the map → Aisha switches to your side on the spot and is controllable this stage; Manami not on the map → fails for goodDiffers from Akurasu
Stage 26The Shooting Star That Never Burns OutComplete Pacifism route
Persuade Aisha with Manami (first step, no prerequisite)
Stage 27What We Fight ForComplete Pacifism route
Then persuade Aisha with Manami (requires the first step)
Stage 31Dark Clouds over the Earth SphereComplete Pacifism route
Checked once on the turn 3 player phase or when 7 or fewer enemies remain, whichever comes first: Manami on the map → Aisha switches to your side on the spot; not on the map → fails for goodDiffers from AkurasuNot verified in game
Stage 26The Moon Is Hell!OZ route (Romefeller side)
Aisha appears when 10 or fewer third-party units remain; the choice appears only if Manami is on the map then; pick “Please, listen to me” or “Wait, Aisha” (option 3 doesn't work)Not on Akurasu
Stage 26Moon AttackOZ route (Moon Attack side)
At the end of the stage, choose “Call out to Aisha”
Stage 31Order to Eliminate TreizeOZ route
Aisha appears when 13 or fewer enemies remain. Persuade with Manami (she stays an enemy; no need to shoot her down)
Stage 32Storm of KilimanjaroOZ route
Manami cannot deploy this stage (still in the roster); Aisha joins at the end of the stageDiffers from AkurasuNot on Akurasu
Aisha joins as the sub-pilot of Manami's unit, replacing Lawrence
- When Manami switches to the Sweemurg S: if Aisha is recruited, at the end of the stage where she joins; if not, at the start of “Earth Sphere in Chaos” on the Independence Army route, at the start of “Storm of Kilimanjaro” on the OZ route, and at the end of “Dark Clouds over the Earth Sphere” on the Complete Pacifism routeNot on Akurasu
- On the Independence Army and Complete Pacifism routes you can control Aisha directly in the stage she joins; on the OZ route she is only registered at the end of the stage
- Whether the Elbulls stays in the hangar as a pilotless unit after joining is unconfirmedNot verified in game
- If Aisha was not recruited, in the story she survives and goes home, handing the Elbulls to Manami to rebuild the SweemurgNot on Akurasu
- In “The Gundam That Leads to Ruin”, Manami's two-way choice toward Aisha only changes dialogue
Differences from Akurasu
- Akurasu says “fewer than 9 / fewer than 7 units” and its flowchart says “8 or fewer / 6 or fewer”; the script already triggers at 9 and 7 remaining
- Akurasu says turn 2 on the Complete Pacifism route; the script's timing falls on the turn 3 player phase
- Akurasu says the OZ route gets the join at the start of “Storm of Kilimanjaro”; the script registers it at the end of that stage, and Manami can't deploy in it
- Akurasu says the swap to the Sweemurg S happens in the same stage whether or not she was recruited; if she wasn't, it comes one stage later on the Independence Army route and moves up to the start of that same stage on the OZ route
Character + unit | Ark exclusiveArk; the steps differ across the three routes
Ehrlich + Norouz
The Independence Army route first requires the Lera branch; on the Independence Army / OZ routes, after persuading, pick option 2 at the end of the stage to enter “Together from Here On”; on the Complete Pacifism route one persuade is enoughDiffers from Akurasu
Stage 16Ideals, ShatteredReal (prerequisite for the Independence Army route)
Any of the three opening options works; those who chose “Ignore her” must make up for it in Operation Daybreak (see the Lera branch)
Stage 19Operation DaybreakReal (prerequisite for the Independence Army route)
At the start, pick “Say hello to Lera”; if you picked “Ignore her” in the previous stage, then pick “I was wrong last time.” If this step fails, the persuade command never appears in “Earth Sphere in Chaos”Differs from Akurasu
Stage 31Earth Sphere in ChaosIndependence Army route
Ehrlich appears on turn 4 or when the enemy is wiped out; persuade him with Ark (he stays an enemy, and shooting him down afterward only changes the dialogue). This stage requires defeating all enemies within 10 turns; you lose in the turn 11 player phase. At the end of the stage pick “I don’t know... I don’t know, but...”; picking “I’m not going to do anything” loses him for goodNot on Akurasu
Stage 26What We Fight ForComplete Pacifism route
Ehrlich also appears when the rival unit arrives. Persuade him with Ark and he switches to your side on the spot
Stage 25The Moon Is Hell!OZ route (Romefeller side)
Ehrlich appears as a third party in the turn 3 player phase or when the enemy is down to 5 or fewer. Persuade him with Ark and he leaves right away
Stage 30Order to Eliminate TreizeOZ route
When 13 or fewer enemies remain Ehrlich appears, and Ark must be on the map at that moment: the Romefeller side also requires the previous step to be done, the Moon Attack side does not. Then persuade with Ark and at the end of the stage pick “I don’t know. I don’t know, but...”Differs from AkurasuNot on Akurasu
Stage 31/32Together from Here OnArk branch
Only Ark deploys, infiltrating to rescue Ehrlich's lover; any enemy entering the target building area or Ark being destroyed is game over. Ehrlich defects midway; after that, wipe out the enemy to clearNot on Akurasu
Ehrlich + Norouz join; the Norouz that joins via “Together from Here On” has 4 upgrade levels, the Complete Pacifism route's has noneNot on Akurasu
- After “Together from Here On” you return to your original route: the Independence Army route continues with “Mars and Marg”, the OZ route with “Storm of Kilimanjaro”; every later stage number is 1 higher than without the branch
- Complete Pacifism route: the Norouz is registered at the end of the stage
Differences from Akurasu
- Akurasu lists picking the 2nd option at the start of “Ideals, Shattered” as step 1; in the script the prerequisite is the Lera branch being active, either the 1st or 2nd option works, and the key is picking “Call out to Lera” in Operation Daybreak
- Akurasu says the OZ route must take the Romefeller side; the Moon Attack side works too, as long as Ark is on the map when the enemy is down to 13 or fewer units
Character + unit | Selain exclusiveSelain; the steps differ across the three routes
Rish + Sigroon
Pick the 2nd or 3rd option when Selain fights Rish, then persuade him once more; on the OZ route you only need to pick onceDiffers from Akurasu
Stage 24Fierce Battle! La Vie en RoseIndependence Army route
Before Selain fights Rish a three-way choice appears: pick “Hmph. You have strange taste” or “As long as you’re the enemy, there’s nothing to do but fight”; after “Enough of your nonsense!” the persuade command never appearsDiffers from Akurasu
Stage 27OZ Divided (Part 1)Independence Army route
Persuade Rish with Selain
Stage 25The Shooting Star That Never Burns OutComplete Pacifism route
Likewise choose option 2 or 3 in the pre-battle three-way choice
Stage 30Dark Clouds over the Earth SphereComplete Pacifism route
Persuade Rish with Selain
Stage 25The Moon Is Hell!OZ route (Romefeller side)
Rish appears in the turn 3 player phase or when the enemy is down to 5 or fewer; the choice only appears if Selain is on the map — pick “Answer him”Not on Akurasu
Stage 25Moon AttackOZ route (Moon Attack side)
Rish fights alongside you temporarily in this stage. At the end of the stage pick “Call out to him again”
Rish + Sigroon join: at the start of “Its Name Is Epyon” on the Independence Army route, at the end of “Return to the Battlefield” on the Complete Pacifism route, and at the start of the next stage on the OZ route (“Where Ambition Leads” or “The Man Who Could Not Become God”); the OZ route's Sigroon comes with 3 upgrade levelsDiffers from AkurasuNot on Akurasu
- After picking option 2 or 3, the start of “OZ Divided (Part 1)” adds a confession from Rish
- Shooting down Rish during the fight only changes dialogue and has no later effect
Differences from Akurasu
- Akurasu says pick “Enough of your nonsense!” on the Independence Army route; that option stops the persuade command from ever appearing later — pick the 2nd or 3rd option
- Akurasu says the Complete Pacifism route gets the join before “Return to the Battlefield” begins; the script registers it at the end of that stage
Character + unitReal takes two steps; Super needs only step 2
Aina + Apsaras
Shiro fights Aina once before persuading her; persuade her once more in “Shock at Victoria”Not on Akurasu
Stage 3Time Has PassedReal
First have Shiro and Aina fight once (either can start it); afterwards, when the two are orthogonally adjacent, persuade with Shiro and she leaves. Without that fight, the Persuade command won't appearNot on Akurasu
Stage 13/14Shock at VictoriaCommon
The second wave appears on the turn 5 player phase or when 8 or fewer enemies remain, and then Aina appears in the Apsaras when 10 or fewer enemies remain. Persuade with Shiro; she leaves at onceNot on Akurasu
At the end of the stage Aina and the Apsaras join
- On Super, step 1 counts as done at the start of “Shock at Victoria”
- On Real, Eiji cannot deploy in “Shock at Victoria”
Differences from Akurasu
- Akurasu only says persuade with Shiro; the script requires one fight first in “Time Has Passed” before the persuade command appears
Character + unitStep 1 is common to all; step 2 only on the Independence Army / OZ routes; anyone who did step 1 can rescue her later
Allenby + Noble Gundam
Two persuasions from Domon get her into the party; later she turns on you, and one persuasion each from Domon and then Rain brings her back — not necessarily in the same turnDiffers from Akurasu
Stage 10Hong Kong City of Sorrow / Break the Vile Trap!Real / Super
Allenby appears when 5 or fewer enemies remain; persuade with Domon. After she leaves she reappears as an enemy in her Berserk version (Noble Gundam B); shooting it down doesn't affect progress. The Super stage clears automatically at the start of the turn 9 enemy phase, so persuade her within the turn 9 player phase; the Real stage has no turn limitNot on Akurasu
Stage 28/29OZ Divided (Part 2)Independence Army route
Allenby appears on the player phase of turn 7 or when the first enemy wave is wiped out; persuade her with Domon (requires step 1); she joins at the end of the stage
Stage 31/32/33Storm of KilimanjaroOZ route
Appears when 10 or fewer enemies remain; then persuade with Domon; joins at the end of the stage
Stage 38/39/40Death Match! Showdown on Lantau Island (Part 2)Independence Army route (“Go with Domon and the others” in “All-Out Attack on the Cyber Beast Force Base”)
The recruited Allenby is forced to deploy and defects on the spot; berserk Allenby appears on the enemy phase of turn 2 or when 15 or fewer enemies remain. Persuade once with Domon, then once with Rain, not necessarily in the same turn. This must be done before the enemy phase of turn 5 begins (when she withdraws) and before Master Asia is shot down; after that she can no longer be persuadedDiffers from AkurasuNot on Akurasu
Stage 40/41/42Fist of Despair and Sorrow (Part 2)OZ route (incl. the Treize branch)
Joined and deployed → she defects at the start; joined but not deployed → she doesn't appear in this stage and isn't lost. Berserk Allenby appears when 12 or fewer enemies remain. Persuade once with Domon, then once with Rain, not necessarily in the same turn; the first time 10 or fewer enemies remain, 12 reinforcements arrive, and when it drops to 10 or fewer again she withdrawsDiffers from AkurasuNot verified in game
Joins at the end of the step-2 stage; if rescued after defecting, rejoins at the end of the stage; if not rescued she becomes the core of the Dark Gundam and is lost for good once shot down
- Those who did only step 1 and not step 2 (e.g. on the Complete Pacifism route) can likewise save her at Lantau or in Fist of Despair, and she joinsDiffers from Akurasu
- If you never persuaded her, the Persuade command won't appear later, and only the Dark Gundam path remains
- When rescued, Dark Gundam's core is replaced by WongNot on Akurasu
- The Lantau stage is only reached by picking “Go with Domon and the others” in “All-Out Attack on the Cyber Beast Force Base”
- For the Burning Gundam and Noble Gundam combination attack “Double Burning Finger”, see “Story-unlocked finishers and combination attacks”
Differences from Akurasu
- Akurasu says she must be persuaded within the same turn in the two later stages; the script has no per-turn reset check, so Domon first and then Rain is enough
- Akurasu says Allenby can't be persuaded if she wasn't recruited earlier; the script only requires step 1 — even without step 2 you can save her and she joins
- Akurasu's flowchart says step 1 must be done before turn 9 ends; only the Super stage has a limit, and it clears automatically as soon as the turn 9 enemy phase begins
Character + unitCommon
Garalia + Bastole
At the start of the turn 4 enemy phase Garalia switches to your side automatically; until then don't shoot her down, and keep Show from fighting herDiffers from Akurasu
Stage 11From Between Sea and LandCommon
From the start of battle until the turn 4 enemy phase begins: do not shoot her down; Show must not attack her, and when she attacks Show, choose Defend or Evade instead (choosing Counter voids it). Other units may attack her, as long as they don't shoot her downDiffers from AkurasuNot verified in game
At the start of the turn 4 enemy phase Garalia switches to your side on the spot and joins permanently with the Bastole
- If a unit other than Show shoots down Garalia, the second wave (Bern and others) doesn't appear, so you also can't get the Magnetic Coating that Bern carriesNot on Akurasu
- Her registration at the start of “The Call of Space”, “Humanity's Victory, and Then... (Part 1)” and “Purification” later on is just a forced story deployment, not another chance to recruit herNot on Akurasu
- Recruiting Garalia is one of the conditions for Silky riding along; it has nothing to do with Tod himself (see Tod)
Differences from Akurasu
- Akurasu says nobody should attack or counter her for 4 turns; the script only checks battles between Show and her — other units attacking her don't matter (except shooting her down)
- Akurasu says the join is immediate; the switch to your side is fixed at the start of the turn 4 enemy phase
Character + battleship | either/orCommon
Ciela + Gran-Garan / Elle + Goraon
The two-way choice at the start of “The Bloodstained Road” decides which of the two stays in the team long-term
Stage 15/16The Bloodstained RoadCommon
At the start, pick “Head to Ciela” → Ciela + Gran-Garan; pick “Head to Elle” → Elle + Goraon. The two sides fight on different maps against the same enemy lineupNot on Akurasu
The side you pick stays with the team long-term
- The side you didn't pick: on the Independence Army route appears as an ally partway through “The Call of Space” and leaves at the end of the same stage; on the Complete Pacifism route joins at the start of “Spreading Malice” and leaves at the end of “Purification”; on the OZ route appears in “Humanity's Victory, and Then... (Part 1)” and leaves at the end of the same stageNot on Akurasu
- In later stages the only difference is dialogue
Differences from Akurasu
- Akurasu says the side you didn't pick joins in stage 22/23 and leaves in stage 23/24; on the Independence Army route it actually appears and leaves within the same stage
Enemy reinforcements + partsCommon
Gyukenki's revenge (Chobham Armor)
Shoot down Gyugaki in “Shapiro, Reborn!”, and in the next stage “The Bloodstained Road” Gyukenki comes for revenge after all enemies are destroyed, carrying a Chobham ArmorNot on Akurasu
Stage 14/15Shapiro, Reborn!Common
Shoot down Gyugaki. Gyugaki withdraws when Drake's HP drops to 33% or below or he is shot down (the stage ends when Drake's HP drops to 33% or below), so shoot him down before that
Stage 15/16The Bloodstained RoadCommon
When the enemy is wiped out, Gyukenki arrives as reinforcements with two Mecha Boryuki; shoot down Gyukenki in battle with one of your units to get a Chobham Armor
Chobham Armor (gained by shooting down Gyukenki)
- If you didn't shoot down Gyugaki, these reinforcements don't appear; whether it also counts when he withdraws with Drake is unconfirmedNot verified in game
- Similar: other part carriers that only appear through player actionNot on Akurasu
- “From Between Sea and Land”: if Garalia joins or is shot down by Show, Bern appears with the Drumlo (Bern carries a Magnetic Coating); if Garalia is shot down by someone else, he doesn't appear
- “Where Ambition Leads” / “The Man Who Could Not Become God”: if Shinobu is on the map when you shoot down Shapiro, Shapiro reappears in the Shapiro Battle Mecha (Bio-Sensor)
- “Order to Eliminate Treize”: if Bask is still on the map when 15 or fewer enemies remain, Gaia and two others appear as reinforcements (Gaia carries a Propellant Tank)
- “A Future of Life and Death”: if Mouar has already been shot down when you shoot down Jerid, Jerid reappears in a new unit (Bio-Sensor)
- “Purification”: if Black Knight was shot down by Show and Elle is on the map, the Mega Booster is carried instead by Black Knight's Hyper Gallaba; otherwise it's on Bern's Hyper Gallaba
Unit refitCommon; any time after obtaining the corresponding Gundam
EW-version Gundam (Endless Waltz)
Once all five unit upgrades of the five Gundam W protagonist units are maxed, they automatically change to the EW versions
anyUpgrade screenCommon
Upgrade all five stats (HP, EN, Mobility, Armor, Limit) to the original cap of 7; checked right after each upgrade you confirm
Wing Zero→Wing Zero Custom; Gundam Deathscythe Hell→Deathscythe Hell Custom; Gundam Heavyarms Kai→Heavyarms Custom; Gundam Sandrock Kai→Sandrock Custom; Altron Gundam→Altron Custom
- Only the five unit upgrades matter; weapon upgrades don't
- The refit is permanent. To keep the TV version, leave one stat below max
- The five stat levels carry over to the EW versions. Some weapons disappear: Deathscythe Hell's Buster Shield, Heavyarms' Army Knife, Altron's Beam Cannon, and Sandrock's Homing Missile / Shield Flash / Beam Machine Gun; the Sandrock Custom additionally gets the Cross Crusher
- In the original, the Altron's Dragon Fire upgrade level doesn't carry over to the Custom; this port's optional rule “Machine swap: carry over three weapons the table misses” adds it
- With this port's optional rule “Upgrade cap” on, the check still uses the original cap of 7: the change happens when all five stats reach 7, after which the EW version can keep upgrading to 15
Character + unit | SuperSuper (on Real joins automatically in the next stage)
Emma + Gundam Mk-II
In “The Gundam That Leads to Ruin”, persuade Emma with Quattro before Kyoji's Dark Gundam drops to half HPNot on Akurasu
Stage 8The Gundam That Leads to RuinSuper
Emma appears in the turn 3 player phase or when the enemy is down to 12 or fewer. Persuade her with Quattro and she leaves on the spot. If Kyoji's Dark Gundam drops to 50% HP or below or is destroyed, the stage ends immediately and there's no further chanceNot on Akurasu
Emma and the Gundam Mk-II join at stage clear
- Nothing to do on Real: Emma joins automatically at the start of the next stage “Soldiers of Sorrow”, piloting the Jegan (1 upgrade level), without the Gundam Mk-IINot on Akurasu
- On Super, if not recruited, Kamille joins piloting the Gundam Mk-II in “The Bloodstained Road”; if recruited, Kamille joins as a pilot only
Differences from Akurasu
- Akurasu only says the join is automatic on Real; in the script the join comes at the start of the next stage, piloting a Jegan
Character | SuperSuper (Brad or Manami)
Erika
Choose option 1 in the choice after clearing “Town of Betrayal”
Stage 13Town of BetrayalSuper
After the stage, choose “Fine by me” (option 1 in both Brad's and Manami's scenarios)
Erika joins (pilot only)
- Picking option 2, “I object,” only changes dialogue
- In the following stages, whether Erika joined only affects a few lines of dialogue
Character + unit | SuperSuper; Independence Army and OZ routes and the Complete Pacifism “with Treize” branch
Naida + Double Spazer
Duke persuades Naida; pick the 1st option at the start of the next stage — picking the 2nd sacrifices her
Stage 35/36Sortie into TurmoilIndependence Army route
Naida appears with the second wave (turn 5 player phase, or when the first wave is wiped out within 5 turns). Persuade her with Duke and she leaves right away
Stage 36/37Galactic Empire Vanguard FleetIndependence Army route
At the start, pick “Have Takeru wake him with Shockwave” → she joins; pick “That can wait” → she self-destructs and dies, and Duke cannot deploy this stageNot on Akurasu
Stage 35/36United FrontOZ route
Persuade Naida with Duke; she leaves at once
Stage 35BrothersComplete Pacifism route (follow Treize)
Persuade Naida with Duke; she leaves at once
Stage 36/37Prelude to RuinOZ route (incl. the Treize branch)
At the start, pick “We can't just leave her like this” → she joins; pick “Deal with the enemy for now” → she dies, Duke cannot deploy, and the enemy's starting lineup also changesNot on Akurasu
Naida joins in the Double Spazer
- Only the Super side meets Naida
- Complete Pacifism “fighting alone” has no chance to persuade Naida along the wayNot on Akurasu
- If you never persuaded Naida there is no opening choice: in “Galactic Empire Vanguard Fleet” only Kamille and Show cannot deploy, and Duke can; “Prelude to Ruin” has no deployment restrictionsDiffers from Akurasu
Differences from Akurasu
- Akurasu's flowchart says Duke can't deploy if Naida wasn't persuaded; the script is the opposite: Duke can't deploy only if she was persuaded and you then pick the 2nd option at the start, sacrificing her
Character | SuperSuper; all routes (the Complete Pacifism route meets it too after merging)
Kirika
Persuade Kirika first with Duke, then with Maria
Stage 37/38All-Out Attack on the Cyber Beast Force BaseIndependence Army route (incl. fighting alone)
Kirika appears in the turn 3 player phase. Persuade her with Duke first, then Maria (in the reverse order Maria has no persuade command)
Stage 37/38An Unseen TomorrowOZ route (incl. the Treize branch)
Kirika appears when the enemy is down to 15 or fewer. Duke first, then Maria
At the end of the stage Kirika joins (pilot only)
- Only the Super side meets Kirika
Character + unit | RealReal (Ark or Selain)
Aboly, Roberto + Schuzrum-Dias
Joins automatically if you choose a Real protagonist
Stage 1Flux / Amid the GunsmokeReal
Nothing to do: both arrive mid-stage as your reinforcements together with Quattro and stay with the team
Aboly and Roberto each pilot a Schuzrum-Dias and join together with Quattro
Character + unit | RealReal; all routes
Gale + Greimkaiser
Persuade Gale with Eiji in “The Shooting Star the Girl Saw”; he then joins automatically depending on the route
Stage 4The Shooting Star the Girl SawReal
Persuade Gale with Eiji (no prerequisite); in the story he is then destroyed and leaves the map
Stage 21The Battle of RyozanpakuIndependence Army route (incl. Complete Pacifism)
Joins at the end of the stage with 3 upgrade levelsDiffers from Akurasu
Stage 27The Nightmare ReturnsOZ route (Gato recruited in “The Moon Is Hell!”)
Joins at the start of the stage with 4 upgrade levels
Stage 27The Chaos Never EndsOZ route (no Gato, or Moon Attack side)
Joins at the end of the stage with 4 upgrade levels
Gale and the Greimkaiser join
- Once Gale joins, he takes over the later Julia escort stages (see “Gale escorts Julia”)
- He is on standby per the story in “Even So, Never Give Up (Part 1)” and “Cusco Absolute Defense Line (Part 1)” and can't deploy
- In the split teams of “Nightmare, Once More” / “A Nightmare with No Waking”, Gale is on both lists and can't deploy whichever side you pickNot verified in game
Differences from Akurasu
- Akurasu says it always comes with 4 upgrade levels; on the Independence Army / Complete Pacifism routes it has only 3
- Akurasu splits the joining stage by Romefeller side / OZ side; the script splits it by whether Gato is in the party
Stage changes | RealGale recruited; Independence Army (including fighting alone) / OZ (including with Treize) route
Gale escorts Julia
Once Gale is recruited, the stage escorting Julia is handled by Gale instead, so Eiji can deployNot on Akurasu
Stage 39–42Even So, Never Give Up (Part 1)Independence Army route (incl. fighting alone)
Gale in the party → Gale stands by in this stage and can't deploy, while Eiji can; not recruited → Eiji stands by
Stage 40–43Even So, Never Give Up (Part 2)Independence Army route (incl. fighting alone)
Gale in the party → Gale is force-deployed; the victory condition is Gale's unit entering the Seal area, and you lose if Gale's unit is destroyed or an enemy enters the Seal area; not recruited → the same conditions apply to Eiji's unit
Stage 37/38Cusco Absolute Defense Line (Part 1)OZ route (incl. the Treize branch)
Eiji can't deploy in this stage; if Gale is in the party, Gale can't deploy either
Stage 38/39Cusco Absolute Defense Line (Part 2)OZ route (incl. the Treize branch)
Gale in the party → the Greimkaiser is force-deployed along with the New Layzner; not recruited → only the New Layzner. The opening and closing dialogue also comes in two versions
Only changes deployment and victory/defeat conditions; no effect on recruitment or rewards
- “Even So, Never Give Up (Part 1)” / “(Part 2)” are entered only if Desperate Breakthrough wasn't completed within 10 turns
- Super has no Gale; Eiji always takes the role
Differences from Akurasu
- Akurasu's flowchart gives this stage's win/loss conditions as “Gale's unit or Eiji's unit”; the script picks one depending on whether Gale was recruited
Units | RealReal
Gundam, Guncannon, Guntank
The three guerrilla units are checked one by one; each one not shot down when the stage is cleared is yoursDiffers from Akurasu
Stage 6The Magnificent Le CainReal
Guerrilla fight in the Guntank, Guncannon and Gundam (third party). Each one withdraws on entering the Green Area, which counts as saved; if one is shot down before withdrawing, you lose that unit. If Le Cain drops to 50% HP or below or is shot down, the stage ends in immediate victory, and any not yet shot down also count as savedNot on Akurasu
Each unit you save joins with 1 upgrade level (no pilot)
- There is an extra funds bonus based on losses (see “The Magnificent Le Cain escort bonus”)
- The stage is cleared as soon as Le Cain's HP reaches 50%; to get the parts he carries, shoot him down from above 50% in a single attack
Differences from Akurasu
- Akurasu says all three must be saved; the script checks each one separately, and you get whichever ones you save
Funds | RealReal
The Magnificent Le Cain escort bonus
Extra funds at the end of the stage based on how many guerrilla units were lostNot on Akurasu
Stage 6The Magnificent Le CainReal
0 lost → funds +35000; 1 → +20000; 2 → +10000; all three lost → no bonus and no unit
End-of-stage funds bonus
- Units that escape into the Green Area don't count as lost
- For the unit rewards see “Gundam, Guncannon, Guntank”
Character | RealReal; Independence Army / OZ routes (the Complete Pacifism route lacks the stages for the last two steps)
Four
Kamille persuades Four four times across three stages; on the Independence Army route the last step also requires Kamille's level to be no lower than Jerid'sDiffers from Akurasu
Stage 10Hong Kong City of SorrowReal
Persuade Four with Kamille twice (the second requires the first); she leaves after the second
Stage 11From Between Sea and LandReal
Four appears after the Garalia scene, when all enemies are destroyed. Persuade her with Kamille and the stage ends in victory immediately. If she was persuaded only once in Hong Kong, the persuasion here is dialogue only and doesn't advanceNot on Akurasu
Stage 28OZ Divided (Part 2)Independence Army route
Kamille can't deploy at the start and arrives in the Zeta Gundam in the turn 3 player phase or when the enemy is down to 8 or fewer. Persuade Four with Kamille and levels are compared right away: Kamille's current level no lower than Jerid's → Four leaves and joins at the end of the stage; not enough → Four is destroyed and lost for goodNot on Akurasu
Stage 31/32Storm of KilimanjaroOZ route
Kamille can't deploy at the start and arrives in the Zeta Gundam in the turn 4 player phase or when the enemy is down to 11 or fewer; Four appears in the turn 3 enemy phase or when the enemy is down to 11 or fewer. Persuade Four with Kamille; there's no level conditionNot on Akurasu
Four joins at the end of the stage (pilot only)
- Jerid's level = on entering this stage, the average level (fractions dropped) of the 15 highest-level pilots currently assigned to your units, + 3; Kamille's level is taken at the moment of persuasion, so level-ups during this stage count
- Kamille's late arrival only happens if Four's first three steps are all done
Differences from Akurasu
- Akurasu's hidden-elements page says Jerid's level = party average + 3; the script uses the average of the top 15 among pilots assigned to units, + 3 (matching Akurasu's flowchart)
- Akurasu doesn't mention the cost of failing the comparison: Four is destroyed and lost for good
Character + unitThe conditions differ across the three routes
Ginrei + Ginrei Robo TYPE1
Daisaku just needs enough kills: 20 or more at the end of the stage on the Independence Army / Complete Pacifism routes, 30 or more on entering the stage on the OZ routeDiffers from Akurasu
Stage 21/22The Battle of RyozanpakuIndependence Army route (incl. Complete Pacifism)
End-of-stage check: Daisaku just needs 20 kills; the final blow of this stage counts tooDiffers from Akurasu
Stage 24/25Tallgeese DestroyedOZ route
Start-of-stage check: Daisaku's kill count must already be 30 on entering this stage; kills scored in this stage don't countDiffers from Akurasu
Ginrei and the Ginrei Robo TYPE1 join
- The Complete Pacifism route only splits off at the end of “The Battle of Ryozanpaku”; the check is the same as on the Independence Army route
- Ginrei can't deploy in “Char's Rebellion” (the same on every route)Not on Akurasu
Differences from Akurasu
- Akurasu says the Independence Army route needs “more than 20”; the script accepts exactly 20
- Akurasu says the OZ route must reach 30 before “Tallgeese Destroyed” ends; the script checks at the start of that stage
Character | Independence Army routeIndependence Army route
Rosamia
In “Defense of Sweetwater”, Kamille must be on the map when Gates appears; then shoot down Gates so she leaves. In “Earth Sphere in Chaos”, shoot down Gates first, then persuade her and she joins on the spotDiffers from Akurasu
Stage 26/27Defense of SweetwaterIndependence Army route
At the start of the turn 5 player phase (or when you wipe out the enemy early), Gates and Rosamia appear; Kamille must be on the map at that moment, or both retreat on the spot and this element fails. Once she appears, don't shoot her down (that fails it); shoot down Gates and she leaves with himDiffers from Akurasu
Stage 31/32Earth Sphere in ChaosIndependence Army route
Gates and Rosamia appear when Baren is destroyed. Shoot down Gates first, then persuade Rosamia with Kamille: she leaves on the spot and joins. Persuading while Gates is still there gives only dialogue, and you can't persuade again this stageNot on Akurasu
Rosamia joins on the spot (pilot only)
- In “Defense of Sweetwater”, Rosamia first appears on your side and then turns enemy, so shooting her down doesn't get you the Bio-Sensor registered to herNot verified in game
- The Complete Pacifism and OZ routes don't pass through these two stages
Differences from Akurasu
- Akurasu doesn't mention that Kamille must be on the map the moment Gates appears in “Defense of Sweetwater”
- Akurasu says the join comes after clearing the stage; the script registers it on the spot when persuaded
- Akurasu doesn't mention that the wrong order voids it: persuading while Gates is on the map uses up the stage's only chance
Character + unitMust be persuaded on the Independence Army route; joins automatically (pilot only) on the OZ route and the Complete Pacifism “with Treize” branch; unobtainable on the Complete Pacifism “fight alone” branch {≠}
Hilde + Taurus
Persuade Hilde with Duo in “OZ Divided (Part 1)” and keep her alive until the end of the stage
Stage 27/28OZ Divided (Part 1)Independence Army route
Hilde is there from the start. Persuade her with Duo and she switches to your side on the spot; don't let her be shot down before the end of the stage, or she's lost for good along with the Taurus
Stage 32/33/34Envoy from AxisOZ route
Joins automatically at the end of the stage, pilot onlyDiffers from Akurasu
Stage 33/34The Man Back from JupiterComplete Pacifism route (follow Treize)
Joins automatically at the end of the stage, pilot onlyDiffers from Akurasu
Independence Army route: Hilde + Taurus; other routes: Hilde only
- When Noin joins in “Sortie into Turmoil” on the Independence Army route, if Hilde was recruited Noin joins as a pilot only and you get a Taurus later in “A Battle Without Victors”; if not, Noin brings the Taurus directly
Differences from Akurasu
- Akurasu says the other routes get an automatic join; in the script those routes only get the pilot, and the “going it alone” branch gets nothing at all
Units | Independence Army routeIndependence Army route (the Complete Pacifism and OZ routes don't pass through this stage)
Gundam Mk-III + Methuss Kai
Obtained automatically by clearing “Mars and Marg”
Stage 32/33/34Mars and MargIndependence Army route
Just clear the stage
Obtain the Gundam Mk-III (no pilot); Methuss becomes Methuss Kai, keeping its upgrade levels
Units | Complete Pacifism routeComplete Pacifism route
Minerva X
Persuade twice with Koji in “What We Fight For”
Stage 26/27What We Fight ForComplete Pacifism route
Minerva X appears when 8 or fewer enemies remain. Persuade with Koji twice (the second requires the first, and both must be in this stage); she leaves after the second
At the end of the stage the Minerva X joins (no pilot) with 5 upgrade levels
Units | Complete Pacifism routeComplete Pacifism route
MP Great Mazinger
Obtained automatically by clearing “Charge! Destroy the Mobile Fortress! (Part 2)”
Stage 29/30Charge! Destroy the Mobile Fortress! (Part 2)Complete Pacifism route
Just clear the stage
Obtain the MP Great Mazinger (no pilot), with 3 upgrade levelsNot on Akurasu
Character + unit | OZ route (temporary)OZ route, Romefeller side; always leaves later on
Gato + GP02A Physalis
In “Tallgeese Destroyed” choose “I can't obey Romefeller”; in “The Moon Is Hell!” get your flagship into the base first, or wipe out both enemy forces in turnDiffers from Akurasu
Stage 24/25Tallgeese DestroyedOZ route
After the stage, choose “I can't obey Romefeller” to enter “The Moon Is Hell!”
Stage 25/26The Moon Is Hell!OZ route (Romefeller side)
The victory condition is “Wipe out the enemy / battleship reaches the lunar base,” achievable two ways: ① get your flagship (usually Bright's ship) into the base's Green Area first, clearing the stage at once; ② wipe out the Muge forces first (after the first wipe-out Shapiro appears around the base with reinforcements, which must also be wiped out), then wipe out the Yellow third party. It fails only if Scirocco or Bask himself enters the base first; other Yellow units entering the base have no effectDiffers from AkurasuNot verified in game
At the end of the stage Gato + the GP02A Physalis (3 upgrade levels) join; the next stage is “Where Ambition Leads”
- Zeta Gundam, GP03 and Re-GZ (no pilots) are obtained whether or not you succeed
- Scirocco only appears after Helmut is shot down
- Gato always leaves later on, taking the GP02A: pick “We should not cooperate with Haman” at the start of “Showdown! Face-Off with Emperor Zuul! (Part 2)” → he leaves at the end of that stage (if he's deployed in it, he also leaves the battlefield on the spot when Haman turns on you); pick “We should cooperate with Haman” → he leaves at the end of the next stage, “A Future of Life and Death”Not verified in game
- This opening choice also decides Haman's stance: cooperate → on the turn 2 player phase Haman and 5 others appear as a third party and withdraw after the enemy is wiped out; don't cooperate → after the enemy is wiped out Haman appears as an enemy with 10 subordinatesNot on Akurasu
- Whether Gato is in the party also changes later lineups: the swaps at the start of “Because of That Purity”, whether Gato pilots the GP02A on the enemy side among the reinforcements in “Scirocco Rises”, and whether Gato pilots the GP02A or the Neue Ziel in “Vortex of Space”Not on Akurasu
- On failure the next stage is “The Man Who Could Not Become God” (see “The Moon Is Hell!: defending the base”)
Differences from Akurasu
- Akurasu says don't let any Yellow unit enter the base; the script only checks Scirocco and Bask themselves, and it's also achieved if the flagship reaches the base first or both waves are wiped out
- Departure timing: the Akurasu hidden-elements page says the opposite of the script; the Akurasu flowchart matches the script
Unit upgrades | OZ routeThe route where you picked OZ in Operation Daybreak (the Complete Pacifism “with Treize” branch doesn't go through this stage)
FA Hyaku-Shiki Kai
At the start of “Envoy from Axis”, the Hyaku-Shiki automatically changes to the FA Hyaku-Shiki Kai
Stage 32/33/34Envoy from AxisOZ route
Nothing to do: the refit happens automatically at the start, and the flagship becomes the Nahel Argama
The Hyaku-Shiki becomes the FA Hyaku-Shiki Kai; the five stats keep their upgrade levels, but upgrades to the 60mm Vulcan and Clay Bazooka are not inherited
- In “Vortex of Space”, Quattro and Kamille come back mid-stage as reinforcements and can't deploy in this stage; at the end of the stage Quattro leaves again, leaving his unit behindNot on Akurasu
- For players who took the Complete Pacifism route (moving to the with-Treize branch), Quattro returns piloting the Hyaku-Shiki, not the FA Hyaku-Shiki KaiNot on Akurasu
Character + unit | OZ / Treize branchOZ route; the Treize branch of the Complete Pacifism route
Zechs + Gundam Epyon
Joins automatically on both lines
Stage 31/32/33Storm of KilimanjaroOZ route
Zechs fights in the Wing Zero this stage; at the end of the stage Zechs switches to the Gundam Epyon, and Heero leaves along with the Wing ZeroNot on Akurasu
Stage 34/35BrothersComplete Pacifism route (follow Treize)
Joins at the start piloting the Gundam Epyon
Zechs + Gundam Epyon join
- On the OZ route, Heero returns in “United Front”
- Later, in “Haman's Shadow”, the Gundam Epyon can be changed to the Tallgeese III (see Tallgeese III)
Character + unitTwo lines: on the Independence Army line (including fighting alone) pilots the Sirbine, on the OZ line (including with Treize) pilots the Zwauth
Tod (+ Silky)
Show persuades Tod three times, and Tod joins as reinforcements on turn 3 later on; if at that moment Marvel has 30 kills and Garalia is on the team, Silky also rides alongDiffers from Akurasu
Stage 14/15Shapiro, Reborn!Common
Persuade Tod with Show (first step, no prerequisite)
Stage 22/23The Call of Space / Spreading MaliceIndependence Army / Complete Pacifism route
Then persuade Tod with Show (requires the first step)
Stage 21/22For a United Earth SphereOZ route
Then persuade Tod with Show (requires the first step)
Stage 37–41Desperate Breakthrough (Part 1)Independence Army route (incl. fighting alone)
On the turn 3 player phase, Tod joins as reinforcements piloting the SirbineDiffers from Akurasu
Stage 36/37/38An Unseen TomorrowOZ route (incl. the Treize branch)
On the turn 3 player phase, Tod joins as reinforcements piloting the ZwauthDiffers from Akurasu
Tod joins; if at the check Marvel has 30 or more kills and Garalia has joined, Silky rides along as sub-pilot
- If Tod is shot down in the stage he joins, he's lost permanently and Silky leaves with himNot on Akurasu
- Kills on turns 1 and 2 also count toward Marvel's 30
- Garalia only affects Silky, not Tod
- Complete Pacifism route: “fighting alone” joins as on the Independence Army route, “with Treize” as on the OZ route
Differences from Akurasu
- Akurasu lists recruiting Garalia as step 1 for Tod; the script's persuasion and join never check Garalia — it only affects Silky
- Akurasu says the OZ route gets the join at the start of “An Unseen Tomorrow”; the script makes it a turn 3 player phase reinforcement
- Akurasu says Marvel's kills must reach 30 before the stage starts; the script checks the moment Tod appears
Character + unitOn every route, in different stages
Rose + Zeron
Two key steps: in the second stage, have Takeru shoot down Marg while Rose is on the map and persuade Rose; in the third stage, persuade Rose again. Persuading Marg only changes dialogue and can be skippedDiffers from Akurasu
Stage 34/35/36Sortie into TurmoilIndependence Army route
(Optional) Persuade Marg with Takeru; only affects later dialogue
Stage 35/36In a World of Endless Strife (Part 2)Complete Pacifism route (fight alone)
(Optional) Persuade Marg with Takeru; only affects later dialogue
Stage 35/36/37Galactic Empire Vanguard FleetIndependence Army route (incl. fighting alone)
With Rose on the map, have Takeru shoot down Marg (whether or not you persuaded Marg earlier), then persuade Rose with Takeru. If Takeru is adjacent to both Marg and Rose he'll only persuade Marg, so keep Takeru next to Rose alone
Stage 38–42Desperate Breakthrough (Part 2)Independence Army route (incl. fighting alone)
Then persuade Rose with Takeru and she leaves
Stage 32/33/34Envoy from AxisOZ route
(Optional) Persuade Marg with Takeru; only affects later dialogue
Stage 33/34The Man Back from JupiterComplete Pacifism route (follow Treize)
(Optional) Persuade Marg with Takeru; only affects later dialogue
Stage 34/35/36United FrontOZ route
With Rose on the map, have Takeru shoot down Marg (whether or not you persuaded Marg earlier), then persuade Rose with Takeru. If Takeru is adjacent to both Marg and Rose he'll only persuade Marg, so keep Takeru next to Rose alone
Stage 34/35BrothersComplete Pacifism route (follow Treize)
With Rose on the map, have Takeru shoot down Marg (whether or not you persuaded Marg earlier), then persuade Rose with Takeru. If Takeru is adjacent to both Marg and Rose he'll only persuade Marg, so keep Takeru next to Rose alone
Stage 35/36/37Prelude to RuinOZ route (incl. the Treize branch)
Then persuade Rose with Takeru and she leaves
At the end of the last-step stage, Rose and the Zeron (3 upgrade levels) joinNot on Akurasu
- In the second stage, if Marg is shot down by someone else, or while Rose is not on the map, the persuade command never appears in the third stage
- If you persuaded Marg, Rose's lines when leaving in the third stage are different
Differences from Akurasu
- Akurasu lists persuading Marg as a required step; the script only uses it to pick dialogue — the real prerequisite is Takeru shooting down Marg while Rose is on the map
Character + unitIndependence Army (including fight alone) and OZ (including with Treize)
Ple + Qubeley Mk-II
First get Glemy off the battlefield, then persuade Ple with Judau; get the order wrong and this stage's chance is lostNot on Akurasu
Stage 40–45A Battle Without VictorsIndependence Army route (incl. fighting alone)
Persuade Ple with Judau (no prerequisite); she leaves at once
Stage 41–46Conquest of the Earth SphereIndependence Army route (incl. fighting alone)
Once Glemy is off the map (shot down or gone), persuade Ple with Judau and she switches to your side on the spot. Persuading while Glemy is still there gives only dialogue, and you can't try again this stageNot on Akurasu
Stage 44/45/46Vortex of SpaceOZ route (incl. the Treize branch)
No previous step needed. First shoot down Glemy (withdrawal doesn't count), then persuade Ple with Judau and she switches to your side on the spot; persuading her while Glemy is still on the map is voidNot on Akurasu
Ple and the Qubeley Mk-II join
- Recruiting Ple is a prerequisite for Ple-Two
CharactersTwo lines; Ple must be recruited first
Ple-Two
Judau persuades Ple-Two in three consecutive stages; in one of them Glemy must still be on the map, and in another it must be before Glemy retreats
Stage 43–48Decisive Battle Zone (Part 2)Independence Army route (incl. fighting alone)
Persuade Ple-Two with Judau (requires Ple on the team)
Stage 44–49AmbitionIndependence Army route (incl. fighting alone)
Then persuade with Judau and she leaves
Stage 46–51The Battle for Axis (Part 2)Independence Army route (incl. fighting alone)
Persuade with Judau while Glemy is still on the map: Ple-Two joins after a destruction scene. Persuading once Glemy is gone gives only dialogue, and you can't try again this stageNot on Akurasu
Stage 45/46/47Haman's ShadowOZ route (incl. the Treize branch)
Persuade Ple-Two with Judau (requires Ple on the team)
Stage 46/47/48Driving AmbitionOZ route (incl. the Treize branch)
Then persuade with Judau; do it before Glemy's HP drops to 30% or below, or he withdraws, taking Ple-Two with himNot on Akurasu
Stage 47/48/49Lives, ScatteredOZ route (incl. the Treize branch)
Then persuade with Judau and Ple-Two joins
Ple-Two joins (pilot only)
- Opening two-way choice of “Driving Ambition”: “Let's see what Haman does” → the Axis Forces watch as a third party, and you only need to wipe out the Glemy Army to clear; “Take on both sides” → both the Glemy Army and the Axis Forces must be wiped out, and Haman withdraws when her HP drops to 30% or below. Afterwards it only affects the next stage's opening dialogueNot on Akurasu
Differences from Akurasu
- Akurasu says persuade before shooting down Glemy; in “Driving Ambition” Glemy can't be shot down — at 30% HP or below he retreats, taking Ple-Two with him
Character + unit | either/orIndependence Army route (including the Complete Pacifism “fight alone” branch)
Mashymre + Zaku III Custom / Chara + Geymalk
Keep both alive until the end of “Decisive Battle Zone (Part 1)” and persuade only one of them; after choosing to stay in the Earth Sphere, they join on turn 8 of “Char's Rebellion”
Stage 42–47Decisive Battle Zone (Part 1)Independence Army route (incl. fighting alone)
Mashymre and Chara both fight on your side; both must still be on the map at the end of the stage (both leave at the end of the stage)
Stage 45–50The Battle for Axis (Part 1)Independence Army route (incl. fighting alone)
Persuade one of them with Judau; the other's persuade command disappears at once. If Judau is adjacent to both, only Mashymre is persuaded. If either failed to last to the end of the previous stage, the persuade here has no effect
Stage 48–53Nightmare, Once MoreIndependence Army route (incl. fighting alone)
After the stage, choose “Remain in the Earth Sphere”
Stage 49–54Char's RebellionIndependence Army route (incl. fighting alone)
On the turn 8 player phase, the persuaded one joins as reinforcements; clearing the stage before then loses them for good
The persuaded one joins along with their unit
Differences from Akurasu
- Akurasu's hidden-elements page says the join is automatic in the next stage; the script, matching Akurasu's flowchart, makes it a turn 8 player phase reinforcement
UnitOnly players who chose the Independence Army in Operation Daybreak and didn't switch to the Complete Pacifism route {+}
Neue Ziel
Choose to stay in the Earth Sphere in “Nightmare, Once More” and clear “Char's Rebellion”
Stage 48–53Nightmare, Once MoreIndependence Army route
After the stage, choose “Remain in the Earth Sphere”
Stage 49–54Char's RebellionIndependence Army route
Just clear the stage
At the end of the stage you get the Neue Ziel (no pilot) with 3 upgrade levelsNot on Akurasu
- Unobtainable for anyone who took the Complete Pacifism route (whichever route they merge into later), and on the OZ route reaching “Char's Rebellion” via “A Nightmare with No Waking”Not on Akurasu
CharactersOZ route (including the Treize branch)
Schwarz survives
Deploy Ryoma at the start of “Fist of Despair and Sorrow (Part 2)”, and Schwarz survives and stays in the teamDiffers from AkurasuNot verified in game
Stage 40/41/42Fist of Despair and Sorrow (Part 2)OZ route (incl. the Treize branch)
Deploy Ryoma at the start (in any unit)Differs from Akurasu
The sacrifice scene still plays, but Schwarz and the Shadow Gundam are not removed from the team; the end of the stage switches to dialogue in which he survives via the Getter pathDiffers from AkurasuNot verified in game
- If Ryoma isn't deployed, Schwarz leaves permanently along with the Shadow Gundam when the stage is cleared
Differences from Akurasu
- Akurasu says deploy Shin Getter; the script checks whether the pilot Ryoma is on the map at the start
- Akurasu is unsure whether he returns later; when Ryoma is deployed the script skips the step that removes Schwarz, so he stays in the party
Units | OZ routeOnly for players who chose OZ in Operation Daybreak; Complete Pacifism → with Treize can't get it
Mass-production Nu Gundam
Obtained automatically by clearing “Fist of Despair and Sorrow (Part 2)”; choose one of two loadouts
Stage 40/41/42Fist of Despair and Sorrow (Part 2)OZ route
After the stage, choose “Funnel type” → MP Nu Gundam F; choose “Incom type” → MP Nu Gundam I
Obtain the MP Nu Gundam F or I (no pilot)
- Once the F type's Fin Funnels is fully upgraded, Fin Funnels MAP is added
Unit swapOZ route (including the Treize branch)
Tallgeese III
After clearing “Haman's Shadow”, choose to change to the Tallgeese III
Stage 45/46/47Haman's ShadowOZ route (incl. the Treize branch)
After the stage, choose “Change to the Tallgeese III”
Zechs switches to the Tallgeese III, and the Gundam Epyon is lost
- Picking “Keep the Gundam Epyon” leaves it unchanged
Unit appearanceTwo lines; Ple and Ple-Two have both joined
Qubeley Mk-II recolor
After choosing to stay on Earth, pick red in the recolor choice that follows
Stage 48–53Nightmare, Once MoreIndependence Army route (incl. fighting alone)
After the stage, choose “Remain in the Earth Sphere”; if Ple and Ple-Two have both joined, a color choice follows right after — choose “Change to Ple-Two's red”
Stage 48/49/50A Nightmare with No WakingOZ route (incl. the Treize branch)
Same as above: choose “Remain in the Earth Sphere”, then “Change to Ple-Two's red”
The Qubeley Mk-II becomes the red version, piloted by Ple-Two
- Picking “Keep Ple's black” leaves it unchanged
- Both colors of Funnel add the Funnel MAP once fully upgraded
Differences from Akurasu
- Akurasu calls the original color Violet; the in-game option says “black for Ple”
Character + unitIndependence Army / OZ routes (the Complete Pacifism route doesn't pass through the deciding stage)
Kyral + Mandala Gundam
Shoot down Kyral with Domon; in “Terror! Dark Axis Activates! (Part 1)” keep him alive until the last enemy wave is wiped outDiffers from Akurasu
Stage 31/32Earth Sphere in ChaosIndependence Army route
Kyral appears in the turn 5 enemy phase (counted from when Baren is destroyed in the opening story battle); shoot him down with DomonNot verified in game
Stage 30/31Order to Eliminate TreizeOZ route
Kyral appears on the player phase after the first enemy wave is wiped out; shoot him down with DomonDiffers from Akurasu
Stage 50–55Terror! Dark Axis Activates! (Part 1)Common
When the first enemy wave is wiped out, Kyral appears as an ally together with Rasid's Maganac Corps; if he is still on the map when the last enemy wave is wiped out, he switches to your side and joins. If he is shot down along the way you don't get himNot on Akurasu
Kyral and the Mandala Gundam join
- Kyral must be shot down by Domon; a shoot-down on Domon's counterattack also counts
Differences from Akurasu
- Akurasu's flowchart says Kyral appears on turn 5; on the OZ route he actually waits until the first enemy wave is wiped out
- Akurasu says he joins automatically afterward; the script requires him to survive until the last enemy wave is wiped out
Character + unitCommon
Quess + Jagd Doga
Don't shoot down Quess; after the Ra Cailum reaches Axis and before the 2nd player phase begins, shoot down Char with Amuro
Stage 52–57Screaming SpaceCommon
With Quess on the map, have Amuro shoot down Char (Char abandons his unit and is caught by Amuro). The deadline is the start of the 2nd player phase after the Ra Cailum enters the Axis area; doing it before it enters also works. The Ra Cailum must reach Axis before the end of turn 7, or it's game over at the start of the turn 8 player phaseNot on AkurasuNot verified in game
At the end of the stage Quess and the Jagd Doga (no pilot, 6 upgrade levels) join and can take part in the final stage
- If Char is shot down by anyone other than Amuro, or only after the time limit, Char dies, and Quess is destroyed with him if she's on the map
Story + deployment restrictionsOZ route (including the Treize branch)
Chizuru surgery branch (whether Combattler V can deploy)
Deploying Hyoma in “A Future of Life and Death”, or Hyoma reaching 15 kills by the end of “Showdown! Face-Off with Emperor Zuul! (Part 2)”, triggers Chizuru's surgery story, and Hyoma can't deploy in “Haman's Shadow”Not on AkurasuNot verified in game
Stage 42/43/44Showdown! Face-Off with Emperor Zuul! (Part 2)OZ route (incl. the Treize branch)
Hyoma reaches 15 kills by the end of the stage → the scene of Chizuru feeling unwell plays and the surgery line begins
Stage 43/44/45A Future of Life and DeathOZ route (incl. the Treize branch)
Hyoma on the map after deploying → scene where Chizuru's brainwaves go haywire and the combination is forcibly undone, entering the surgery line (kill count doesn't matter). Hyoma not deployed but already at 15 in the previous stage → a separate end-of-stage scene with Chizuru absent, also entering the surgery line
Stage 44/45/46Vortex of SpaceOZ route (incl. the Treize branch)
The surgery storyline continues at the end of the stage
Stage 45/46/47Haman's ShadowOZ route (incl. the Treize branch)
The Chizuru surgery event plays at the start; Hyoma cannot deploy this stage (still in the roster)
Only changes the story and deployment in “Haman's Shadow”; if neither condition is met, the Combattler V is usable as usual
- To use Combattler V in “Haman's Shadow”: keep Hyoma under 15 kills in “Showdown! Face-Off with Emperor Zuul! (Part 2)” and do not deploy Hyoma in “A Future of Life and Death”Not verified in game
Weapon unlocksCommon
Extra weapons from full upgrade
Upgrading the weapons below to the unit's original cap automatically adds a new weapon
anyUpgrade screenCommon
Fully upgrade the weapon on the left of the table below
Adds the weapon on the right
- Nu Gundam, MP Nu Gundam F: Fin Funnels → Fin Funnels MAP
- Gundam Mk-II, Super Gundam: Diffuse Bazooka → Diffuse Bazooka MAP
- Qubeley Mk-II (both colors), Jagd Doga: Funnel → Funnel MAP
- Geymalk: Mother Funnel → Funnel MAP
- Wing Zero (including bird mode): Twin Buster Rifle MAP → Twin Buster Rifle 2 MAP
- Gundam Heavyarms Kai: Double Gatling Gun → Full Barrage MAP
- Giant Robo: Rocket Missile → Full Barrage MAP
- Great Mazinger, MP Great Mazinger: Breast Burn → Breast Burn MAP
- Mazinger Z (JS): Rocket Punch → Big Wheel Rocket Punch; Breast Fire → Breast Fire MAP
- Minerva X: Breast Fire → Breast Fire MAP
- GoShogun (joins via Link Battler): Go Flasher → Go Flasher MAP
- Fin Funnels MAP and Funnel MAP don't hit allies; the other added MAP weapons hit allies within range
- With this port's optional rule “Upgrade cap” on, the check still uses the original cap: the weapon is added at the original cap level, and upgrading on to 15 doesn't add it again
Weapon unlocksCommon; the unlocking stage differs by route
Story-unlocked finishers and combination attacks
The weapons below unlock automatically in fixed stages; combination attacks aren't story-unlocked and appear in the weapon list whenever their conditions are metDiffers from Akurasu
Stage 29/30Meikyo ShisuiIndependence Army route
Start of stage: the finishers of the four Shuffle Alliance members unlock: Burning Machine Gun Punch (Chibodee), Rose Hurricane (George), Shin Ryusei Kochoken (Sai Saici), Gaia Crusher (Argo)Not on Akurasu
Stage 29/30A Heart Within the FistOZ route
Start of stage: the same four attacks unlockNot on Akurasu
Stage 31/32Return to the BattlefieldComplete Pacifism route
When all enemies are wiped out (also given if you hold out to the player phase of turn 16): the same four attacks unlock as aboveNot on Akurasu
Stage 36/37/38All-Out Attack on the Cyber Beast Force BaseIndependence Army route (incl. fighting alone)
End of stage: the Dancouga learns Dancou KougakenNot on Akurasu
Stage 36/37/38An Unseen TomorrowOZ route (incl. the Treize branch)
End of stage: the Dancouga learns Dancou KougakenNot on Akurasu
Stage 37/38/39Death Match! Showdown on Lantau Island (Part 1)Independence Army route (“Go with Domon and the others” in “All-Out Attack on the Cyber Beast Force Base”)
End of stage: the Burning Gundam learns Sekiha Tenkyoken
Stage 37–41Desperate Breakthrough (Part 1)Independence Army route (incl. fighting alone)
Start of stage: Combattler V learns Twin Lancer, V Laser, Big Blast Divider and Grand Dasher, the same on all three routes; if you did not take the Lantau path, Burning Gundam also learns Sekiha Tenkyoken hereDiffers from Akurasu
Stage 37/38/39Cusco Absolute Defense Line (Part 1)OZ route (incl. the Treize branch)
Start of stage: Combattler V learns the same four attacksDiffers from Akurasu
Stage 39/40/41Fist of Despair and Sorrow (Part 1)OZ route (incl. the Treize branch)
End of stage: the Burning Gundam learns Sekiha TenkyokenDiffers from Akurasu
The weapon is added automatically; nothing to do
- Combination attacks are re-checked every time the weapon list opens: they appear when the participants are connected (diagonal adjacency counts) and each meets its EN and Will requirements; each use costs every participant EN once, with no ammo usedNot on Akurasu
- Double Burning Finger: the Burning Gundam H (Domon enters Super Mode automatically at 130+ Will) and your Allenby's Noble Gundam, each needing 130 Will and 60 EN. No story unlock needed; also usable on the OZ route once Allenby is recruitedDiffers from AkurasuNot verified in game
- Shuffle Alliance Fist: 130 Will, 100 EN; likewise needs no story unlock, and doesn't require the four members' finishers above to be unlockedDiffers from AkurasuNot verified in game
- Sekiha Love Love Tenkyoken: besides the combination conditions it requires Sekiha Tenkyoken to be unlocked, so it becomes usable when Sekiha Tenkyoken doesDiffers from Akurasu
- “Empress Janera's Human Hunt” itself unlocks no weaponsDiffers from Akurasu
Differences from Akurasu
- Akurasu says the Janera branch adds Combattler V's four weapons; the script unlocks them for all three branches at the start of “Desperate Breakthrough (Part 1)”, and on the OZ route at “Cusco Absolute Defense Line (Part 1)”
- Akurasu says the Lantau branch adds Sekiha Tenkyoken; the other routes get it too, just one stage later — on the OZ route at the end of “Fist of Despair and Sorrow (Part 1)”
- Akurasu gives Sekiha Love Love Tenkyoken and Shuffle Alliance Fist their own unlock stages; the former follows Sekiha Tenkyoken, the latter is usable as soon as its conditions are met
- Akurasu lists Double Burning Finger at EN 80; the ROM data says 60
Route splitCommon
Operation Daybreak: OZ or Independence Army
The choice after clearing Operation Daybreak decides between the OZ route and the Independence Army route
Stage 19/20Operation DaybreakCommon
After the stage, choose “Join OZ and work to restore order” → OZ route (next stage “A New Path”); choose “We cannot accept what OZ has done” → Independence Army route (next stage “Farewell, Warrior”)
The OZ route runs straight through to the end; the Independence Army route also splits off the Complete Pacifism route at “The Battle of Ryozanpaku”
- Choosing OZ makes Wufei and the Shenlong Gundam leave
- Only choosing OZ here lets you get the mass-produced Nu Gundam later
- OZ route only: Gato, FA Hyaku-Shiki Kai, mass-production Nu Gundam
- Independence Army route only (not Complete Pacifism): Rosamia, Hilde + Taurus, Gundam Mk-III + Methuss Kai, Neue Ziel
Route splitIndependence Army route
The Battle of Ryozanpaku: Complete Pacifism route
Pick option 3 at the start and option 2 after the stage to switch to the Complete Pacifism route
Stage 21/22The Battle of RyozanpakuIndependence Army route
Pick option 3 at the start (the trusting, agreeing answer, e.g. Ark's “I want to believe it can come true”), then option 2 after the stage (the answer wanting to help, e.g. Ark's “I wish there were something we could do to help”) → Complete Pacifism route (next stage “Spreading Malice”); any other combination → “The Call of Space”
Enters the Complete Pacifism route; it splits once more when “Return to the Battlefield” is cleared
- Complete Pacifism route exclusive: Minerva X, MP Great Mazinger
- Brad can't get Kurtz (“What We Fight For” may show Kurtz surviving, but he doesn't join)
- Ark only needs to persuade Ehrlich once in “What We Fight For”, and he joins on the spot
- Without the qualifying stages for Rosamia, Four's last two steps, Gundam Mk-III + Methuss Kai and Kyral, these can't be obtained
- After the Complete Pacifism route, you can't get the Neue Ziel whichever route you merge into later; if you moved to the with-Treize branch, Quattro still returns in the Hyaku-ShikiNot on Akurasu
- If you did Allenby's step 1, you can save her and recruit her later at Lantau or in Fist of DespairNot on Akurasu
Route splitComplete Pacifism route
Return to the Battlefield: with Treize or going it alone
The choice after clearing “Return to the Battlefield” decides whether you merge into the OZ route or the Independence Army route
Stage 31/32Return to the BattlefieldComplete Pacifism route
After the stage, choose “Side with Treize” → Treize branch: Fierce Fighting in Space → The Man Back from Jupiter → Brothers → merges into the OZ route at “Prelude to Ruin”
Stage 31/32Return to the BattlefieldComplete Pacifism route
Pick “We'll fight on our own” → The Galactic Empire's Threat → White Fang → In a World of Endless Strife (Part 1) and Part 2 → merges into the Independence Army route at “Galactic Empire Vanguard Fleet”
After merging, it continues with that route's second-half flow
- Treize branch: Zechs + Gundam Epyon join at the start of “Brothers”; Hilde joins at the end of “The Man Back from Jupiter” (pilot only)
- The Treize branch can't get the mass-production Nu Gundam (it only goes to players who picked OZ in Operation Daybreak)
- Fight alone: Hilde is unobtainable, and there is no chance to persuade NaidaNot on Akurasu
- The stages for persuading Rose vary by branch (see Rose)
Route splitOZ route
Tallgeese Destroyed: Romefeller side or Moon Attack side
The choice after clearing “Tallgeese Destroyed” decides the next stage
Stage 24/25Tallgeese DestroyedOZ route
After the stage, choose “I can't obey Romefeller” → The Moon Is Hell! (Romefeller side); choose “We act as OZ to the very end” → Moon Attack (Moon Attack side)
The Moon Attack side continues to “The Man Who Could Not Become God” → “The Chaos Never Ends”; on the Romefeller side it depends on whether you hold the base (see “The Moon Is Hell!: holding the base”); the two sides merge at “Because of That Purity”
- Gato can only be obtained on the Romefeller side
- There is one more choice at the start: “Fight the Empire first” makes Zechs switch to your side on the spot and fight alongside you; “Fight Zechs too” only changes dialogue. Does not affect the route
- Ginrei's kill-count check happens at the start of this stage
- The protagonist-exclusive content works differently on each side: Aisha and Rish each have one dialogue choice; on the Romefeller side Ehrlich must be persuaded once beforehand
Route splitOZ route, Romefeller side
The Moon Is Hell!: holding the base
Whether you hold the base decides whether Gato stays and the next two stages
Stage 25/26The Moon Is Hell!OZ route (Romefeller side)
Your flagship enters the base first, or wipe out the Muge forces (including Shapiro's reinforcements) and then the Yellow third party in order → Gato joins, next stages “Where Ambition Leads” → “The Nightmare Returns”; Scirocco or Bask himself enters the base first → “The Man Who Could Not Become God” → “The Chaos Never Ends”Differs from AkurasuNot verified in game
The two lines merge at “Because of That Purity”
- Gale (Real): joins at the start of “The Nightmare Returns” if Gato is in the party, otherwise at the end of “The Chaos Never Ends”
- Rish (Selain) joins at the start of the next stage, the same on both branches
- The lineups of “Because of That Purity”, “Scirocco Rises” and “Vortex of Space” afterwards also differ depending on whether Gato joined (see Gato)Not on Akurasu
Differences from Akurasu
- Akurasu says don't let any Yellow unit enter the base; the script only checks Scirocco and Bask themselves
Route splitArk or Brad; Independence Army / OZ routes
Ark / Brad exclusive side branch
Once Ehrlich's or Kurtz's conditions are met, you play one extra stage, “Together from Here On” or “Time to Settle It”
Stage 31/32Earth Sphere in ChaosIndependence Army route
Ark: persuade Ehrlich and choose option 2 after the stage → “Together from Here On”; Brad: meet Kurtz's conditions → automatically enters “Time to Settle It”
Stage 30/31Order to Eliminate TreizeOZ route
Same as above
After the branch you return to your route: the Independence Army route continues with “Mars and Marg”, the OZ route with “Storm of Kilimanjaro”; every later stage number is 1 higher than without the branch
- For conditions see “Ehrlich + Norouz” and “Kurtz + Virose”
- Only Ark deploys in “Together from Here On”; the game is over if any enemy enters the target building area or Ark is destroyedNot on Akurasu
- Only Brad deploys in “Time to Settle It”; the game is over if Brad is destroyedNot on Akurasu
- Selain and Manami don't have this branch; neither does the Complete Pacifism route
Route splitReal; affects all three routes
Lera branch: Those Eyes Reflect No Future
Two choices involving Lera decide whether the Lera branch is active
Stage 16Ideals, ShatteredReal
Opening three-way choice: either “Talk with Lera” or “Try to get Lera off the ship” works; “Ignore her” must be made up for in Operation DaybreakDiffers from Akurasu
Stage 19Operation DaybreakReal
At the start, pick “Say hello to Lera” (picking “Leave her be” fails it). If you picked “Ignore her” in the previous stage, there is one more choice: Ark picks “I was wrong last time,” Selain picks “That’s true, but...”Differs from Akurasu
Stage 32/33Mars and MargIndependence Army route
If the condition is met the next stage is “Those Eyes Reflect No Future”, otherwise “Enter! Super Electromagnetic Robo”
The Independence Army route goes to “Those Eyes Reflect No Future” (Lera is killed); all paths then continue with “Sortie into Turmoil”
- Both stages give the same at the end: the Double Spazer, the Drill Spazer and Maria
- This is also a prerequisite for recruiting Ehrlich on the Independence Army route (see Ehrlich)Differs from Akurasu
- Complete Pacifism route: Lera leaves at the start of “Purification”; OZ route: in “Humanity's Victory, and Then... (Part 2)” Lera sees through Marquis Janus posing as Sally, is taken hostage and dies at the end of the stage; the deployment lineup is the same as when the branch isn't activeNot on Akurasu
- Dialogue in over ten other stages also changes accordingly
- Super has none of these choices and always goes to “Enter! Super Electromagnetic Robo”
Differences from Akurasu
- Akurasu only says pick the 2nd option at the start of “Ideals, Shattered”; in the script the 1st also works, you must pick “Call out to Lera” in Operation Daybreak, and if you picked the 3rd option you can make up for it in Operation Daybreak
Route splitIndependence Army route (including the Complete Pacifism “fight alone” branch)
Cyber Beast Force Base: the three teams split up
After clearing “All-Out Attack on the Cyber Beast Force Base”, choose which team to go with
Stage 36/37/38All-Out Attack on the Cyber Beast Force BaseIndependence Army route (incl. fighting alone)
After the stage, choose “Go with the main force” → straight to “Desperate Breakthrough (Part 1)”; choose “Go with Domon and the others” → Death Match! Showdown on Lantau Island (Part 1) / (Part 2); choose “Go with Hyoma and the others” → Empress Janera's Human Hunt
All three lines merge at “Desperate Breakthrough (Part 1)”
- The Lantau branch has two extra stages and the Janera branch one, so later stage numbers shift up accordingly
- Lantau branch: Allenby, if in the party, turns on you and has to be won back (see Allenby); Burning Gundam learns Sekiha Tenkyoken one stage earlier
- Weapons are largely unaffected by this choice: Combattler V's four attacks come at the start of “Desperate Breakthrough (Part 1)” on all three paths, and Sekiha Tenkyoken also comes there on the other two paths (see story-unlocked finishers and combination attacks)Differs from Akurasu
- For enemy lineups on the Janera branch, see “Janera branch: Super Beasts and reinforcements”
- The opening story of “Desperate Breakthrough (Part 1)” differs with this choice
Differences from Akurasu
- Akurasu says the Janera branch adds Combattler V's four weapons and the Lantau branch adds Sekiha Tenkyoken; in the script all three branches get both
Route splitIndependence Army route (including the Complete Pacifism “fight alone” branch)
Desperate Breakthrough: 10-turn limit
Clearing both parts within 10 turns (turn 10 included) skips one stage
Stage 37–41Desperate Breakthrough (Part 1)Independence Army route (incl. fighting alone)
The victory condition is getting all your units into the Green Area: each unit leaves the map on entering, and the stage clears once all have left (or the enemy is wiped out). Must be done within 10 turnsDiffers from AkurasuNot verified in game
Stage 38–42Desperate Breakthrough (Part 2)Independence Army route (incl. fighting alone)
Also must be completed within 10 turns; if Part 1 ran over time, finishing Part 2 quickly doesn't help
Both parts achieved → “Warped Space”; otherwise → “Even So, Never Give Up (Part 1)” / “(Part 2)”, one extra stage. Both continue to “A Battle Without Victors” afterwards
- Running out of time doesn't cause defeat; it only affects the branch
- Tod (Sirbine) joins as reinforcements on the player phase of turn 3 in Part 1; Rose is persuaded in Part 2
Differences from Akurasu
- Akurasu's flowchart says any unit reaching the marked point is enough; the on-screen victory condition is all your units entering the Green Area
Route splitIndependence Army (including fight alone) / OZ (including with Treize)
Muge space or Earth
Choose between going to Muge's space and staying on Earth; the other group temporarily can't deploy but stays on the team
Stage 48–53Nightmare, Once MoreIndependence Army route (incl. fighting alone)
After the stage, choose “Go to the Muge universe” → The Last Roar; choose “Remain in the Earth Sphere” → Char's Rebellion
Stage 48/49/50A Nightmare with No WakingOZ route (incl. the Treize branch)
After the stage, choose “Go to the Muge universe” → A Distant Gamble; choose “Remain in the Earth Sphere” → Char's Rebellion
Both sides merge at “Terror! Dark Axis Activates! (Part 1)”, where everyone can deploy again
- Obtainable only if you stay on Earth: Mashymre or Chara (Independence Army), Neue Ziel (Independence Army), Qubeley Mk-II recolor
- Available when going to the Muge universe, unable to deploy when remaining in the Earth Sphere: Bright, Banjo, Alan, Sara, Ryo, Masato, Shinobu, Heero, Duo, Wufei, Trowa, Takeru, Rose, Koji, Boss, Sayaka, Duke, Maria, Ryoma, Hayato, Benkei, Hikaru, Kirika, Naida, Erika, Eiji, David, SimoneNot on Akurasu
- Usable if you stay on Earth, cannot deploy if you go to Muge space: the G Gundam pilots and Allenby, Amuro, Kamille, Quattro, Kou, Judau, Shiro, Fa, Roux, Aina, Emma, Ple, Four, Ple-Two, Rosamia, Beecha etc., Quatre, Milliardo, Noin, Hilde, Zechs, Tetsuya, Jun, the Cosmo Crusher team, Hyoma and the rest of the Combattler V group, Daisaku and Ginrei, Ciela, Elle, Show and the rest of the Dunbine group, Julia, Chara, Howard, etc.Not on Akurasu
- The protagonist and anyone on neither list can be used on both sides; Gale is on both lists and can't deploy on either sideNot verified in game
- Gandor (Dr. Hazuki) can't deploy in “The Last Roar”, “A Distant Gamble” or “Char's Rebellion”Not on Akurasu
Differences from Akurasu
- Akurasu lists both lineups by series, which doesn't fully match the two rosters in the ROM (e.g. Gale can't deploy on either side)
Enemy lineupIndependence Army route (including fight alone), picking “Go with Hyoma and the others” in “All-Out Attack on the Cyber Beast Force Base”
Janera branch: Super Beasts and reinforcements
Which of the two Super Beasts is destroyed first, and whether Janera is still on the map, decide how the reinforcements play out and whether the Big Sirius appearsNot on Akurasu
Stage 37/38/39Empress Janera's Human HuntIndependence Army route (incl. fighting alone)
At the start there are the Super Beast Shishiris Kiba, Shishiris Garo and Janera; the initial defeat condition is Chizuru being destroyed. Reinforcements arrive when the first wave is wiped out or on the turn 4 player phase: while Janera is on the map, whichever Super Beast was destroyed first briefly reappears in a cutscene, then Big Sirius appears, plus Warchimedes's Magma Beast Darkron squad (Warchimedes carries a Chobham Armor)Not on Akurasu
Stage 37/38/39Empress Janera's Human HuntIndependence Army route (incl. fighting alone)
If Janera has left the battlefield and both Super Beasts were destroyed while she was still there, the reinforcements are only the Darkron squad, without Big SiriusNot verified in game
Only changes this stage's enemy lineup; no recruitment or cross-stage effect
- Janera retreats at 30% HP or below; she has Super Alloy Z, so shoot her down in a single attack
- When the Big Sirius is shot down, Janera also leaves if she's on the map
- Similar: other enemy lineups changed by “whether someone is on the map”Not on Akurasu
- “Blade of Anguish”: if Heero isn't on the map, the Wing Gundam (Heero) appears as a third party
- “The Sanc Kingdom Falls”: Heero on the map at the start of the player phase on turn 3 → Milliardo appears as an enemy in the Wing Zero; not on the map → he joins as a guestDiffers from Akurasu
- “Charge! Destroy the Mobile Fortress! (Part 1)”: when 8 or fewer enemies remain, Dark General on the map → MP Great Mazinger×8; Boss not on the map → Warbeast×9
- “The Man Back from Jupiter”: Bask on the map when the area is reached → Virgo×9
- “In a World of Endless Strife (Part 2)”: Gandal on the map → Minifo×9
- “A Battle Without Victors”: Treize on the map → Wufei appears in the Altron; Haman on the map → Ple appears in the Qubeley
- “Lives, Scattered”: if Gato and Chara are on the map, each reappears in a new unit
Differences from Akurasu
- Akurasu says that in “The Sanc Kingdom Falls” he's only an ally if Heero is shot down before Milliardo appears; the script checks whether Heero is on the map at the start of the turn 3 player phase
Deployment restrictionsConditional
Hidden deployment restrictions
In some stages, earlier choices or recruitment progress keep specific characters from deploying at the start (they stay in the team)Not on Akurasu
Stage 2Swarm of Killing MachinesReal (Ark)
At the start, pick “Let me think it over a little more” → Ark cannot deploy at first; after Gale's squad appears on the turn 4 player phase (or when the enemy is wiped out), Ark arrives in the Soldifar on the turn 6 player phase or when 6 or fewer enemies remain. Pick “I'll go” to deploy normally
Stage 13Shock at VictoriaReal
Eiji can't deploy
Stage 28OZ Divided (Part 2)Independence Army route (all three Four steps done)
Kamille can't deploy at the start and arrives in the Zeta Gundam in the turn 3 player phase or when the enemy is down to 8 or fewer
Stage 31/32/33Storm of KilimanjaroOZ route
All of Four's first three steps done → Kamille can't deploy at the start and arrives on the player phase of turn 4 or when 11 or fewer enemies remain; in Manami's scenario, the earlier steps for Aisha done → Manami can't deploy in this stage
Stage 35/36/37Galactic Empire Vanguard FleetIndependence Army route (incl. fighting alone)
Kamille and Show can't deploy; if Naida was persuaded and you pick “That can wait” at the start → Duke can't deploy eitherDiffers from Akurasu
Stage 35/36/37Prelude to RuinOZ route (incl. the Treize branch)
If you persuaded Naida: pick “We can't just leave her like this” → Guerrilla cannot deploy; pick “Deal with the enemy for now” → Duke cannot deploy either. No restrictions if you never persuaded herDiffers from Akurasu
Stage 45/46/47Haman's ShadowOZ route (incl. the Treize branch)
Hyoma cannot deploy if the Chizuru surgery path triggers (see the Chizuru surgery branch)
Stage 49–54Char's RebellionAll routes
Quatre and Ginrei can't deploy; Gandor (Dr. Hazuki) can't deploy; on the OZ route and the Treize branch, Noin can't deploy either
Only restricts deployment at the start or in this stage; doesn't affect recruitment
- For deployment changes in the Julia escort stages once Gale joins, see “Gale escorts Julia”
- While the team is split between Muge space and Earth, the other group temporarily can't deploy; see “Muge space or Earth”
Differences from Akurasu
- Akurasu's flowchart says Duke can't deploy if Naida wasn't persuaded; the script is the opposite
Story dialogueCommon
Dialogue-only branches
The choices or conditions below only change dialogue and don't affect recruitment, team composition or routeNot on Akurasu
Stage 1FluxReal (Ark)
The three-way choice “Y-yes...” / “Leave me alone!” / “...” only changes dialogue
Stage 8The Gundam That Leads to RuinSuper (Manami)
The two-way choice toward Aisha, “Wait, Aisha!” / “Too bad, Aisha”, only changes dialogue
Stage 20–23A New Path / The Call of Space / Spreading MaliceAll routes
The squad name “March Wind” two-way choice, “Let's go with that” / “I don't like it”: picking option 2 opens squad-name entry in the original, while this port fixes the squad name and automatically answers option 1
Stage 20A New PathOZ route (Selain)
The three-way choice “I don’t have time to play along with your nonsense” / “As if I’d ever think that” / “Silence!” only changes dialogue
Stage 38–42Death Match! Showdown on Lantau Island (Part 2) / Fist of Despair and Sorrow (Part 2)Independence Army Lantau line / OZ route
When Domon defeats Master Asia, the closing dialogue comes in two versions, depending on whether Domon had already fought him before this stage
Stage 40–45A Battle Without VictorsIndependence Army route (incl. fighting alone)
Noin can persuade Milliardo, dialogue only
Stage 49–54Char's RebellionIndependence Army route (never on Complete Pacifism)
Noin can persuade Milliardo once more, again dialogue only
Dialogue only
- After recruiting Kurtz, he has extra lines in “Enter! Super Electromagnetic Robo”, “Conquest of the Earth Sphere”, “Nightmare, Once More”, “The Last Roar”, “Driving Ambition”, “Char's Rebellion” and “A Nightmare with No Waking”. The original has two flaws: on the Complete Pacifism route these lines also appear when Kurtz survives (without joining); and Kurtz's line at the end of “A Distant Gamble” plays whether or not you recruited him
- With the Lera branch active, the dialogue differs in over ten stages
- The recruitment results for Erika, Ciela / Elle, Aina, Four, Rosamia, Hilde, Naida, Kirika, Ple and others also change individual lines of dialogue in later stages
- Once Domon reaches Meikyo Shisui, his skill list shows “Meikyo Shisui” and the finisher lines of the five Shuffle Alliance members switch to a different set
- Whether Schwarz survives, and the Chizuru surgery branch, also have their own dialogue — see the corresponding entries